Saturday, 4 December 2010

Group Meeting: 04.12.10


We met up today in order to get some much needed experiments in, We met at 10am at the St Mary's building of TVU in our newly appointed room in the basement.
We all brought along various equipment in the hope that we would get better results that our last experiments. Hadjar had also placed an order for a parabolic mirror from the states that we saw for the first time.

The mirror was not a mirror it turned out see had ordered a plastic concave mirror with a reflective surface, i'm not so sure our results will now be as good as we would like them to have been with a real piece of glass with a focal length.

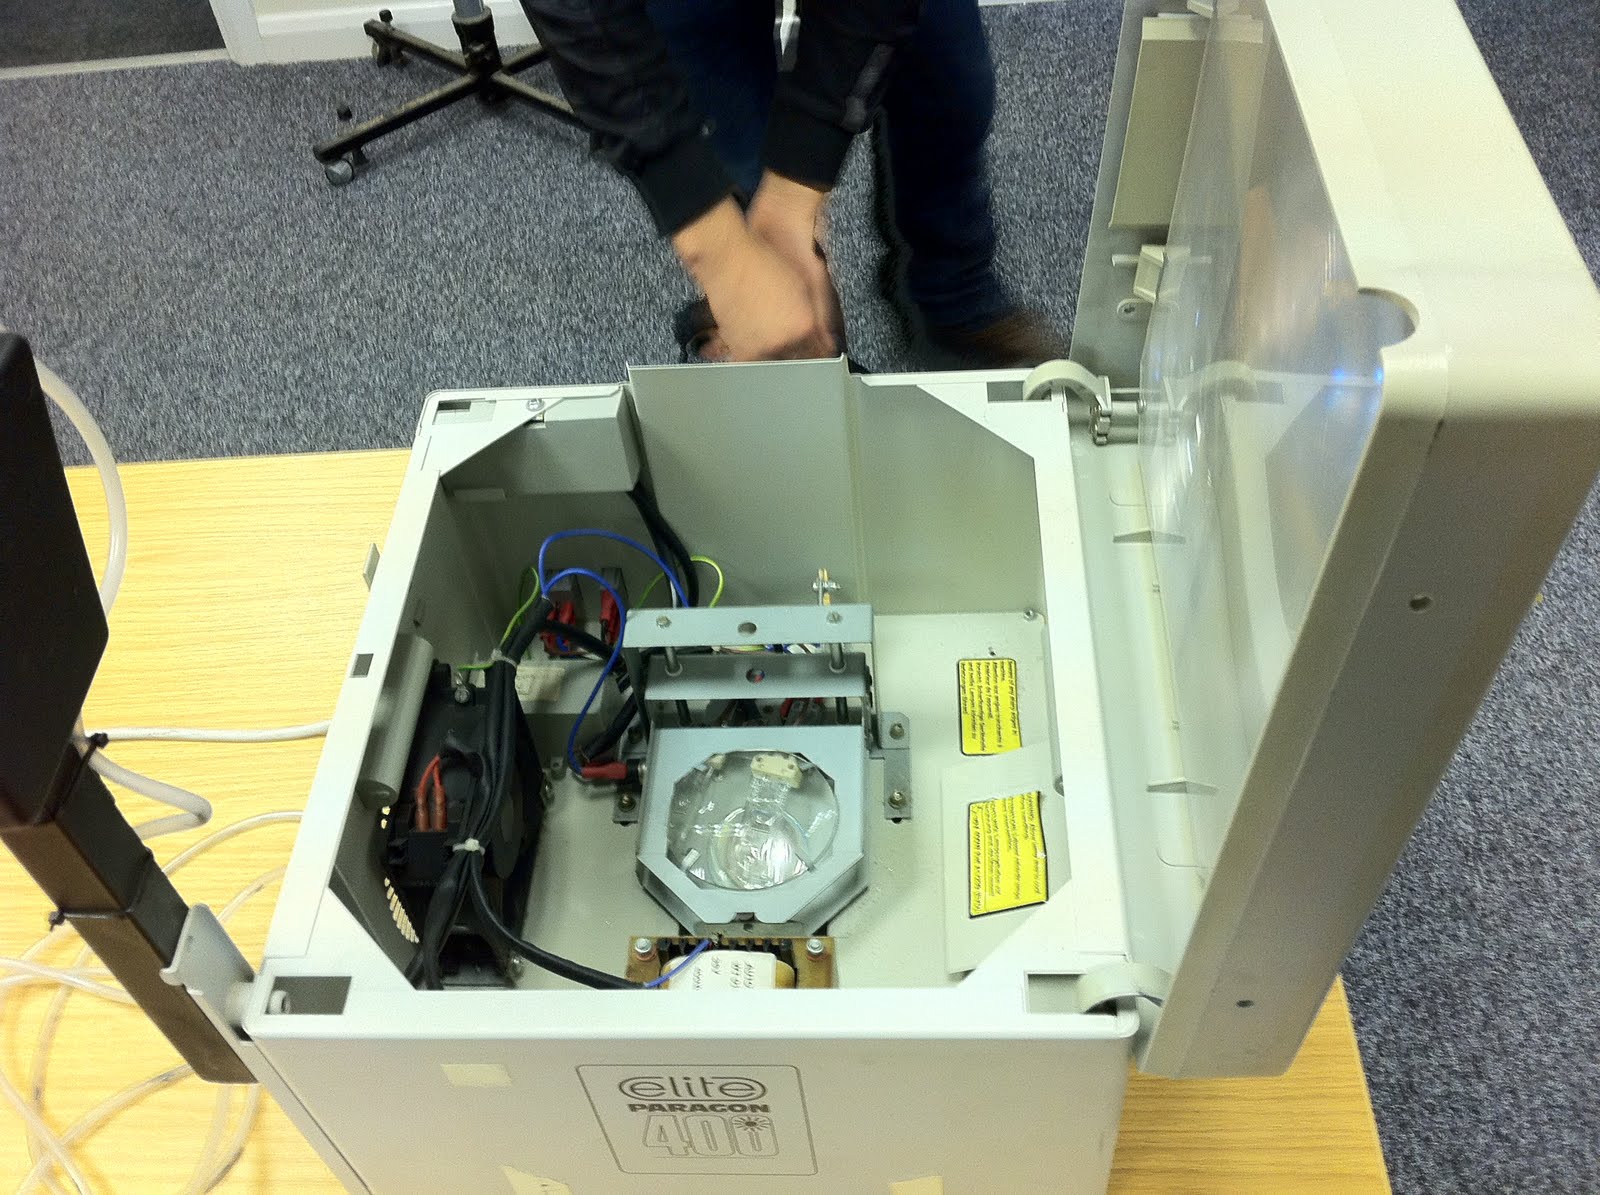
We continued on with our experiments by taking apart the overhead projector and repositioning the parts where they were better suited for our experiment.

We set up the equipment according to the Schilren photography technique and set out to try and get some sort of results.

We fiddled with the overhead projector, blocked the light into cone shapes and also tried to narrow the be
an by covering the bulb with foil and poked a very small hole it to allow the light to shine through.

We moved the angle of the mirror around which we had clamped in place using a work clamp and photography clamps, This achieved a better angle for the light to be shone into.

The reflection back from the mirror we caught on a piece of white card as the strength of the light source we used was not strong enough to give us a large clear refection.

We managed again to see the effects of this technique, but it was small and not that clear, but an improvement on the last experiment.

We changed the light source back to using the LED pocket laser torch and are results were better than with the overhead projector.

We have decided to call it for the day as we had exhausted our resources and need to research further on the possibilities of using a more powerful LED Laser torch.

We did have one thought about using a torch, how would we power it? as replacing the batteries would not be cost effective.

We will be meeting again on Wednesday the 8th of December to experiment further, hopefully with a greater powered light source.

Wednesday, 24 November 2010

MA Meeting: 24.12.10


During our MA session we experimented with an overhead projector to see the capabilities of using it as the light source for our installation. We came to the conclusion that we would at our meeting on the saturday ahead remove and reposition some of the parts in order for us to use it in our experiments.

Concave Mirror: 24.11.10

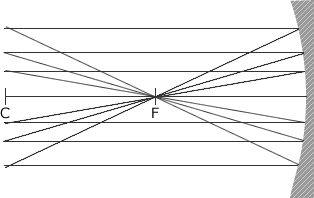
A concave mirror, or converging mirror, has a reflecting surface that bulges inward (away from the incident light). Concave mirrors reflect light inward to one focal point, therefore they are used to focus light. Unlike convex mirrors, concave mirrors show different image types depending on the distance between the object and the mirror.
These mirrors are called "converging" because they tend to collect light that falls on them, refocusing parallel incoming rays toward a focus. This is because the light is reflected at different angles, since the normal to the surface differs with each spot on the mirror.


href="http://www.splung.com/content/sid/4/page/concavemirrors">http://www.splung.com/content/sid/4/page/concavemirrors

http://en.wikipedia.org/wiki/Concave_mirror#Concave_mirrors

Thursday, 18 November 2010

Exhibition: 18.11.10


Shadow Catchers: Camera-less Photography at the V&A
13 October 2010 - 20 February 2011

Plato's cave: 18.11.10

Things to do: 18.11.10

Point light source

concave mirror / parabolic mirror

power source

razor blade

hot and cold objects

filters

surface for reflection to be filmed off

HD video recorder

HD projector

Surface to project onto

Sunday, 14 November 2010

Materials: 14.11.10

Materials we need for our next meeting

1. A larger con-caved mirror

2. A more powerful light source

3. razor blade

4. photography filters

5. different heat sources hot and cold

6. 3 clamps

7. a surface to reflect onto

8. cameras and video cameras to document experiments

Submission: 14.11.10

1. The context chosen - state in one sentence please.

2. The reference material - in the form of an illustrated paper of between 900 and 1100 words.

3. Proposed design of virtual space - annotated sketches. To Include spatial constraints and interactivity proposed.

Presentation ideas: 14.11.10

1. The module and kenetica previous success (liquid atheletes)

2. Individual research collated via group facebook

3. Scott Snibbe - Blow up

4. Nanika - Wind (nokia) (Thomas Müller)

5. Serpentine Gallery: Anthony McCall30 November 2007 – 3 February 2008

6. david bowen - telepresent wind

7. Jifei Ou - Jing Hua

8. Dentsu London - iPad light painting

9. Eadweard Muybridge

10. Ross Ching - Running on Empty

11. Smule - Ocarina iphone app

12. Depeche Mode - "Fragile Tension" & radiohead's 'house of cards' video

13. Wind erosion - dessert effect

14. Memo Akten - Gold dust iphone app

15. Wolfgang Münch & Kiyoshi Furukawa - Bubbles

16. UKRC mind mapping meeting

17. visionlabz - interactive installation

18. real virtual reality - the northern lights

19. Schlieren photography of moving air

20. James Turrell - Exhibition

21. HeHe.org - Twilight

22. light installations by Tamar Frank

23. Schlieren techniques

Wednesday, 10 November 2010

Experiment Two: 10.11.10

Part two:

Experiment Two, part two was using the same materials as in experiments one and two, part one, but laid out in a different arrangement see illustrated diagram below.


Results: We played around with the LED light that we had and created a cover over the top of the light emitting end. The cover was made using a piece of chewing gum packet foil with a hole in the centre which we taped to the light using masking tape. This gave us a beam of light that was very straight/concentrated to start with but as the light distance lengthens the light beam would flare to give a larger diameter of light. We set the lens which was of 10cm focal length lens into the table clap and with a ruler measured 2 x the focal length which is 20cm and placed a stripe of masking tape to the table to represent the correct distance from which the light source should be shone. Instead of using a filter we used a razor blade edge which we taped to a lens holder and placed at the correct distance from the lens at 20 cms along with the light source which we placed in a bendy clap permanently pressing the on button on to give us a constant supply of light. The results we viewed by experimenting not through a camera or a video camera but with our own eyes, as the light reflected off the mirror the reflection ended up being reflected onto a white surface behind us in the studio. We played around with the light source positioning and the white board which we brought closer and we ended up with an image of not only the shadow of the razor blade but an out line of the heat source we used, a lighter. At last we had some sort of image it took a few more further attempts to realise we where visualising the invisible! Although it was small and had no colour due to not using a filter we had our first proper results, very exited... I still need to do further research into why the results with a razor blade were successful and not with the filter, but happy all the same.


See images below:


Part one:

Experiment two, part one was almost a near replica of experiment one but with the whole group present. We set up the equipement that i gathered as illustarted below in a photography studio in the TC buliding, but instead of using my multi bulbed torches we used and experimented with the LED torches and lasers that saally had brought in. Another change to my original set up was that we did not use a digital SLR, but instead used a sony camcorder to record the results and the set up and group interaction.


Results: I feel at this point in our experimentation with the Schliren photography technique that we still didn't quite have the right equipemnet or scientific knowlege to perfect this experiment today. We continued on changing variables within this experiment including the distance between the lense and the filter/light source, LED lights and a red laser, multi coloured spectrum filter and an orange light gel, but still had zero results, a little frustrating. More research needed.


Experiment one: 0.9.11.10

I experimented with Various focal length lenses that i borrowed from the science department within the school that i work out in order to explore the Schilren technique.

I Placed a lens on a stand and worked out the focal length of the lens/mirror, which i worked out to be 10cm. The focal length is used to predicted the place at which the light source should be situated, which is 2x the focal length.

The lens i used had a 10cm focal length so the distance at which i placed my light source and filter were 20cm's away from the lens.

I could only get hold of a torch for the light source which i feel was one of the failings of this experiment, after researching further the light needed was a strong LED light with a wattage of around 3.

I printed out various size repeat spectrum pattern filters on to acetate using a laser jet, which i feel also contributed to my failings of this experiment the print was not fine enough and maybe a little dark.

For the heat source in my experiment i used a lighter as the heat that it emitted would have been very hot and hopefully allow this experiment to work.


Results:

I tried variuos mirror and lens types, different size filters and focal lengths and my results were very disappointing. My thoughts are that the light source i used was not direct and strong enough and also the filters seemed to be too dense. I am going to research further and hope the next experiment tomorrow will be more successful with more heads and resources to perfect this effect.


Printed Filter on acetate

Lens / mirror on stand